Are you a music enthusiast or a budding audio engineer looking to take your studio monitor setup to the next level?
Look no further! In this essential guide, we will delve into the world of audio interfaces and why they are an absolute must-have for any serious studio monitor setup.
Whether you are a seasoned professional or just starting out, having the right audio interface can greatly enhance your recording and monitoring experience.
From providing high-quality sound reproduction to offering versatile connectivity options, an audio interface acts as the bridge between your studio monitors and your computer, ensuring that you get the most accurate and pristine audio playback.
Join us as we explore the key features and benefits of audio interfaces, and discover why investing in one is a game-changer for your studio monitor setup.
Get ready to elevate your audio production to new heights with the unbeatable combination of an audio interface and your trusty studio monitors!
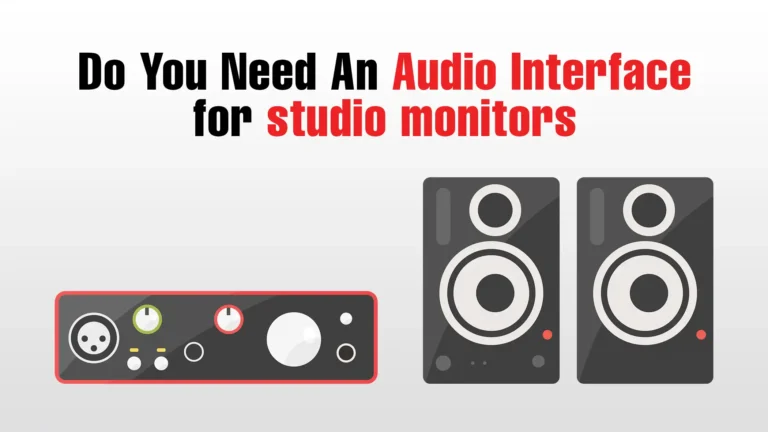
Do You Need an Audio Interface for Studio Monitors?
While it’s not strictly necessary to have an audio interface to use studio monitors, using one can greatly enhance your audio experience and provide more flexibility and functionality, especially if you’re involved in recording or producing music.
Let’s learn about why and how audio interfaces for studio monitors can enhance your audio experience
Understanding the Importance of an Audio Interface in Studio Monitor Setups

Studio monitors are designed to provide accurate and precise sound reproduction, allowing you to hear your recordings and mixes with utmost clarity.
However, directly connecting your studio monitors to your computer’s sound card may not yield the best results. This is where an audio interface comes in.
An audio interface acts as the bridge between your studio monitors and your computer, ensuring that you get the most accurate and pristine audio playback.
It converts the analog audio signals from your computer into digital signals that can be processed and played back through your studio monitors.
This conversion process is crucial for maintaining the integrity of your audio, preserving its quality and fidelity.
Furthermore, audio interfaces often come equipped with high-quality digital-to-analog converters (DACs) and analog-to-digital converters (ADCs), which play a vital role in overall sound reproduction.
These converters are designed to provide superior audio quality, reducing any potential distortion or interference that may occur when using your computer’s built-in sound card.
Key Features and Functionalities of Audio Interfaces

Audio interfaces come with a wide range of features and functionalities that can greatly enhance your studio monitor setup.
Let’s take a closer look at some of the key features you should consider when choosing an audio interface.
1. Connectivity options:
One of the primary advantages of using an audio interface is the wide range of connectivity options it offers.
Most audio interfaces come with multiple inputs and outputs, allowing you to connect various audio sources and devices.
Whether you need to connect microphones, instruments, MIDI controllers, or external processors, an audio interface provides the flexibility and versatility you need.
2. Low-latency monitoring:
Latency refers to the delay between when an audio signal is input into the computer and when it is output through the studio monitors.
High latency can be a major hindrance when recording or monitoring audio, as it can create noticeable delays and affect your performance.
However, many audio interfaces offer low-latency monitoring capabilities, allowing you to hear your audio in real-time without any noticeable delays.
3. Preamps and gain control:
Preamps are essential for capturing and amplifying weak signals from microphones or instruments.
Having high-quality preamps in your audio interface ensures that your recordings are clean, transparent, and free from noise.
Additionally, gain control knobs or buttons allow you to adjust the input level of your audio signal, preventing any distortion or clipping.
4. Headphone outputs:
While studio monitors are the main tool for monitoring audio, having a dedicated headphone output on your audio interface can be extremely useful.
It allows you to listen to your recordings or mixes privately, without disturbing others. Look for an audio interface with a high-quality headphone output and separate volume control for added convenience.
5. Software integration:
Many audio interfaces come bundled with software that allows you to control and customize various settings.
This can include features like routing options, DSP effects, and mixing capabilities.
Software integration not only enhances the functionality of your audio interface but also provides an intuitive and user-friendly interface for managing your audio setup.
Choosing the Right Audio Interface for Your Studio Monitor Setup

When it comes to choosing the right audio interface for your studio monitor setup, there are several factors to consider.
Here are some key considerations to help you make an informed decision:
1. I/O requirements:
Determine the number of inputs and outputs you need for your setup. Consider the types of audio sources you will be connecting and the overall flexibility you require.
Whether you need multiple microphone inputs, instrument inputs, or line-level inputs, choose an audio interface that meets your specific I/O requirements.
2. Audio quality:
Pay close attention to the audio quality and fidelity provided by the audio interface.
Look for high-quality DACs and ADCs, as well as transparent and low-noise preamps. A good audio interface should accurately reproduce your audio without introducing any unwanted coloration or distortion.
3. Compatibility:
Ensure that the audio interface you choose is compatible with your computer’s operating system and software.
Check for driver compatibility and any specific system requirements. Compatibility issues can cause unnecessary headaches and hinder your workflow, so it’s important to do your research beforehand.
4. Budget:
Set a budget for your audio interface and consider the features and functionalities that are most important to you.
While it’s tempting to go for the most expensive option, there are many affordable audio interfaces that offer excellent performance and value for money.
Determine your needs and prioritize accordingly.
Setting up an Audio Interface With Studio Monitors

Once you have chosen the perfect audio interface for your studio monitor setup, it’s time to set it up and start enjoying the benefits. Here’s a step-by-step guide to help you get started:
1. Connect your audio interface:
Begin by connecting your audio interface to your computer via the provided USB, Thunderbolt, or FireWire cable.
Ensure that you have installed any necessary drivers or software before connecting the interface.
2. Connect your studio monitors:
Depending on the type of audio interface you have chosen, you may have different options for connecting your studio monitors.
The most common method is to use balanced TRS or XLR cables to connect the audio outputs of your interface to the inputs of your studio monitors.
Ensure that you have the correct cables and make secure connections.
3. Configure your audio interface settings:
Once your audio interface is connected, open the control panel or software provided with your interface.
Configure the settings according to your requirements, such as sample rate, buffer size, and input/output routing.
Refer to the user manual for detailed instructions on how to set up your specific audio interface.
4. Calibrate your studio monitors:
It’s important to calibrate your studio monitors to ensure accurate and consistent sound reproduction.
Use a reference microphone and measurement software to analyze the frequency response of your monitors in your listening environment.
Adjust the settings on your audio interface and monitor controller as necessary to achieve a balanced and accurate sound.
5. Test and fine-tune:
Once your audio interface and studio monitors are set up, it’s time to test and fine-tune your setup.
Play various audio sources, such as music tracks, recorded material, or virtual instruments, and listen carefully.
Make adjustments to the volume, EQ, and other settings as needed to achieve the desired sound.
Congratulations! You have successfully set up your audio interface with your studio monitors.
Now you can enjoy the enhanced audio quality, flexibility, and control that an audio interface brings to your studio monitor setup.
Troubleshooting Common Issues With Audio Interfaces and Studio Monitors

While audio interfaces are generally reliable and easy to use, occasional issues may arise. Here are some common problems you may encounter and their possible solutions:
1. No sound or distorted sound:
If you’re not getting any sound or experiencing distorted sound, check your audio interface connections and settings.
Ensure that the audio outputs are properly connected to the inputs of your studio monitors and that the volume levels are set correctly.
Also, check that the correct audio interface is selected as the default playback device in your computer’s sound settings.
2. Latency issues:
If you’re experiencing noticeable delays or latency when recording or monitoring audio, adjust the buffer size in your audio interface settings.
Increasing the buffer size can reduce the CPU load and decrease latency, but it may also increase the overall system latency.
Find the right balance that works best for your setup.
3. Noise or interference:
If you’re hearing unwanted noise or interference, check your audio interface connections and cables.
Ensure that all connections are secure and that there are no loose or damaged cables.
Additionally, make sure that your audio interface is properly grounded and away from potential sources of interference, such as power cables or electronic devices.
4. Driver issues:
If you’re experiencing driver-related problems, such as compatibility issues or unstable performance, check for any available driver updates from the manufacturer’s website.
Installing the latest drivers can often resolve compatibility issues and improve overall stability.
If you’re still encountering issues after troubleshooting, it’s recommended to consult the user manual or contact the manufacturer’s technical support for further assistance.
They will be able to provide specific guidance based on your audio interface model and setup.
Tips for Optimizing Your Studio Monitor Setup With an Audio Interface

Now that you have your audio interface and studio monitors set up, here are some additional tips to optimize your setup and get the most out of your equipment:
1. Room acoustics:
Pay attention to the acoustic treatment of your listening environment.
Properly treating your room with absorbers, diffusers, and bass traps can greatly improve the accuracy and clarity of your audio playback.
Consider consulting an acoustic professional or investing in room treatment solutions to create an optimal listening environment.
2. Positioning and placement:
Experiment with the positioning and placement of your studio monitors. Proper placement can greatly affect stereo imaging and overall sound quality.
Follow the manufacturer’s recommendations and consider using speaker stands or isolation pads to minimize vibrations and reflections.
3. Monitor controller:
Consider investing in a dedicated monitor controller for added convenience and control over your studio monitors.
A monitor controller allows you to switch between multiple audio sources, adjust volume levels, and easily mute or dim the audio.
It acts as a central hub for your studio monitor setup, enhancing your workflow and ease of use.
4. Regular maintenance:
Keep your audio interface and studio monitors clean and well-maintained.
Dust and debris can affect the performance and longevity of your equipment. Use a soft cloth to wipe down the surfaces regularly and ensure proper ventilation for your audio interface.
5. Monitor at different levels:
While it’s important to monitor at moderate volumes to protect your hearing, periodically monitor your audio at different levels.
This allows you to evaluate the mix at different listening levels and ensure that it translates well across various playback systems.
By following these tips, you can optimize your studio monitor setup and achieve the best possible audio reproduction with your audio interface.
Comparing Different Audio Interface Brands and Models

There is a wide range of audio interface brands and models available on the market, each offering unique features and specifications.
Here are some popular audio interface brands that are renowned for their quality and performance:
1. Focusrite:
Focusrite is a well-established brand known for its high-quality audio interfaces.
They offer a range of interfaces catering to different needs and budgets, from entry-level options to professional-grade models.
Focusrite interfaces are known for their transparent sound, low-latency performance, and intuitive software integration.
2. Universal Audio:
Universal Audio is highly regarded in the audio industry for its top-of-the-line audio interfaces.
They are known for their exceptional audio quality, thanks to their premium analog circuitry and DSP processing capabilities.
Universal Audio interfaces often come bundled with their renowned UAD plugins, offering powerful processing options for recording and mixing.
3. PreSonus:
PreSonus is a popular brand known for its affordable yet feature-rich audio interfaces.
They offer a wide range of interfaces with various I/O options, preamps, and software integration.
PreSonus interfaces are known for their solid build quality, reliable performance, and user-friendly interfaces.
4. Apogee:
Apogee is synonymous with high-end audio quality and precision.
Their audio interfaces are renowned for their pristine sound reproduction and exceptional analog-to-digital conversion.
Apogee interfaces often come bundled with their proprietary software, offering advanced control and customization options.
When comparing different audio interface brands and models, consider your specific requirements, budget, and the features that are most important to you.
Audio Interface Accessories and Additional Equipment for Studio Monitor Setups

To further enhance your studio monitor setup, consider investing in the following accessories and additional equipment:
1. Monitor stands or isolation pads:
Monitor stands or isolation pads help reduce vibrations and improve the accuracy of your audio playback.
They provide a stable and isolated platform for your studio monitors, minimizing unwanted resonances and reflections.
2. Cables and connectors:
High-quality cables and connectors are essential for maintaining the integrity of your audio signals.
Invest in balanced XLR or TRS cables for connecting your audio interface to your studio monitors, as well as any other audio sources or devices you may have.
3. Subwoofer:
If you’re working with bass-heavy music genres or require an extended low-frequency response, consider adding a subwoofer to your studio monitor setup.
A subwoofer can enhance the overall low-end reproduction and provide a more accurate representation of your mixes.
4. Monitor calibration tools:
Monitor calibration tools, such as reference microphones and measurement software, can help you analyze and optimize the frequency response of your studio monitors.
They allow you to identify any frequency anomalies or room-related issues and make necessary adjustments for a more accurate and balanced sound.
5. Monitor switcher
A monitor switcher allows you to easily switch between multiple sets of studio monitors or audio sources.
This is particularly useful when comparing your mixes across different playback systems or when working with multiple sets of studio monitors.
These accessories and additional equipment can further enhance your studio monitor setup and provide additional flexibility and control over your audio production.
Conclusion of Do you Need Audio Interface for Studio Monitor
Investing in an audio interface is a game-changer for your studio monitor setup.
It allows you to experience the true potential of your studio monitors, providing high-quality sound reproduction, versatile connectivity options, and enhanced control over your audio production.
By understanding the key features and benefits of audio interfaces, choosing the right one for your needs, and optimizing your setup, you can elevate your audio production to new heights.
Remember to consider your specific requirements, budget, and the features that are most important to you when choosing an audio interface.
Experiment with different settings, positions, and accessories to fine-tune your studio monitor setup and achieve the best possible audio reproduction.
With the unbeatable combination of an audio interface and your trust
FAQs (Frequently Asked Questions)
No, audio interfaces are not only for professionals. They are useful for anyone who wants to improve the sound quality of their music, whether it’s for personal enjoyment or professional purposes. It’s like having a superpower to make your music sound amazing!
If you’re using headphones to listen to music or play games, you don’t necessarily need an audio interface. However, if you’re using professional studio headphones for music production, an audio interface can enhance the sound quality and provide more accurate monitoring.
Yes, you can use studio monitors without an audio interface if you’re just listening to music for fun. But if you want to create your own music or make recordings, an audio interface can enhance the sound quality and help you capture the right sounds.
Yes, you can connect studio monitors directly to your computer, but using an audio interface is recommended for better sound quality and control over the audio signals.